TL;DR: The Brush paints every camera-facing triangle in its ring, so it grabs a button cap and the recess wall under it in one stroke. Layerpaint's Detail tool adds a normal-angle filter — it only paints faces pointing the same way as the one you clicked, so flat caps fill while recess walls stay put. Here's when to use it and when to switch back to the Brush.
Why does the Brush leak onto recess walls?
The Brush paints every triangle whose centroid sits inside its 3D ring and faces the camera, so rolling across a flat-topped button picks up the cap, the bevel, and the recess wall beneath it in one stroke. On low-poly STLs the crease between cap and wall is often too shallow for auto-partition to split them, and tightening the crease angle re-splits half the model you didn't want touched. The Detail tool exists for exactly that shape.
A typical multi-color print has surfaces that meet at sharp angles. A raised button cap on a control panel. A recessed cutout in a mech's armor plate. The shapes are simple, the colors should land cleanly on the part that faces you, but the Brush tool doesn't see it that way.
The Brush paints every triangle whose centroid sits inside its 3D ring radius and faces the camera. Roll the ring across a flat-topped button and you get the cap, the bevel, and the recess wall underneath in one stroke. The Region tool would split them at the crease, except low-poly STLs and a few CAD exports come through with creases shallow enough that auto-partition lumps the cap and the wall into one region. Reaching for a tighter crease angle then re-splits half the model you didn't want touched.
The Detail tool exists for exactly this shape: an island of triangles that all face the same direction, surrounded by triangles that don't.
How Detail differs from Brush
The Detail tool runs the same ring-radius paint as the Brush, plus one extra check. Every candidate triangle gets compared against the normal of the face you first clicked. If the candidate's normal differs by more than the Normal tolerance, it's skipped.
The tolerance slider sits in the tool panel when Detail is active. Range is 5° to 90°, default 25°. Twenty-five degrees catches the cap of a button and the slight curvature of a low-poly mesh, but stops cold at a 60° bevel and at a 90° recess wall. Tighten it for nearly-flat caps. Widen it for sloped greebles, like the side panels on a mech's chest plate.
Switch over and paint
The Detail button sits between Brush and Wand in the left tool rail. Click it, or press P to cycle through tools (region → brush → detail → wand → crease → select). The brush ring turns blue so you know which mode you're in.
Pick the palette slot you want. Number keys 1–9 select chips directly. Click the flat surface you want painted. Drag to extend coverage if the cap is larger than the ring. The cap fills and the recess walls stay the colour they already were.
Resize the ring with [ and ], or hold Ctrl and scroll. Smaller rings help on dense greeble fields where multiple buttons sit close together.
A worked example
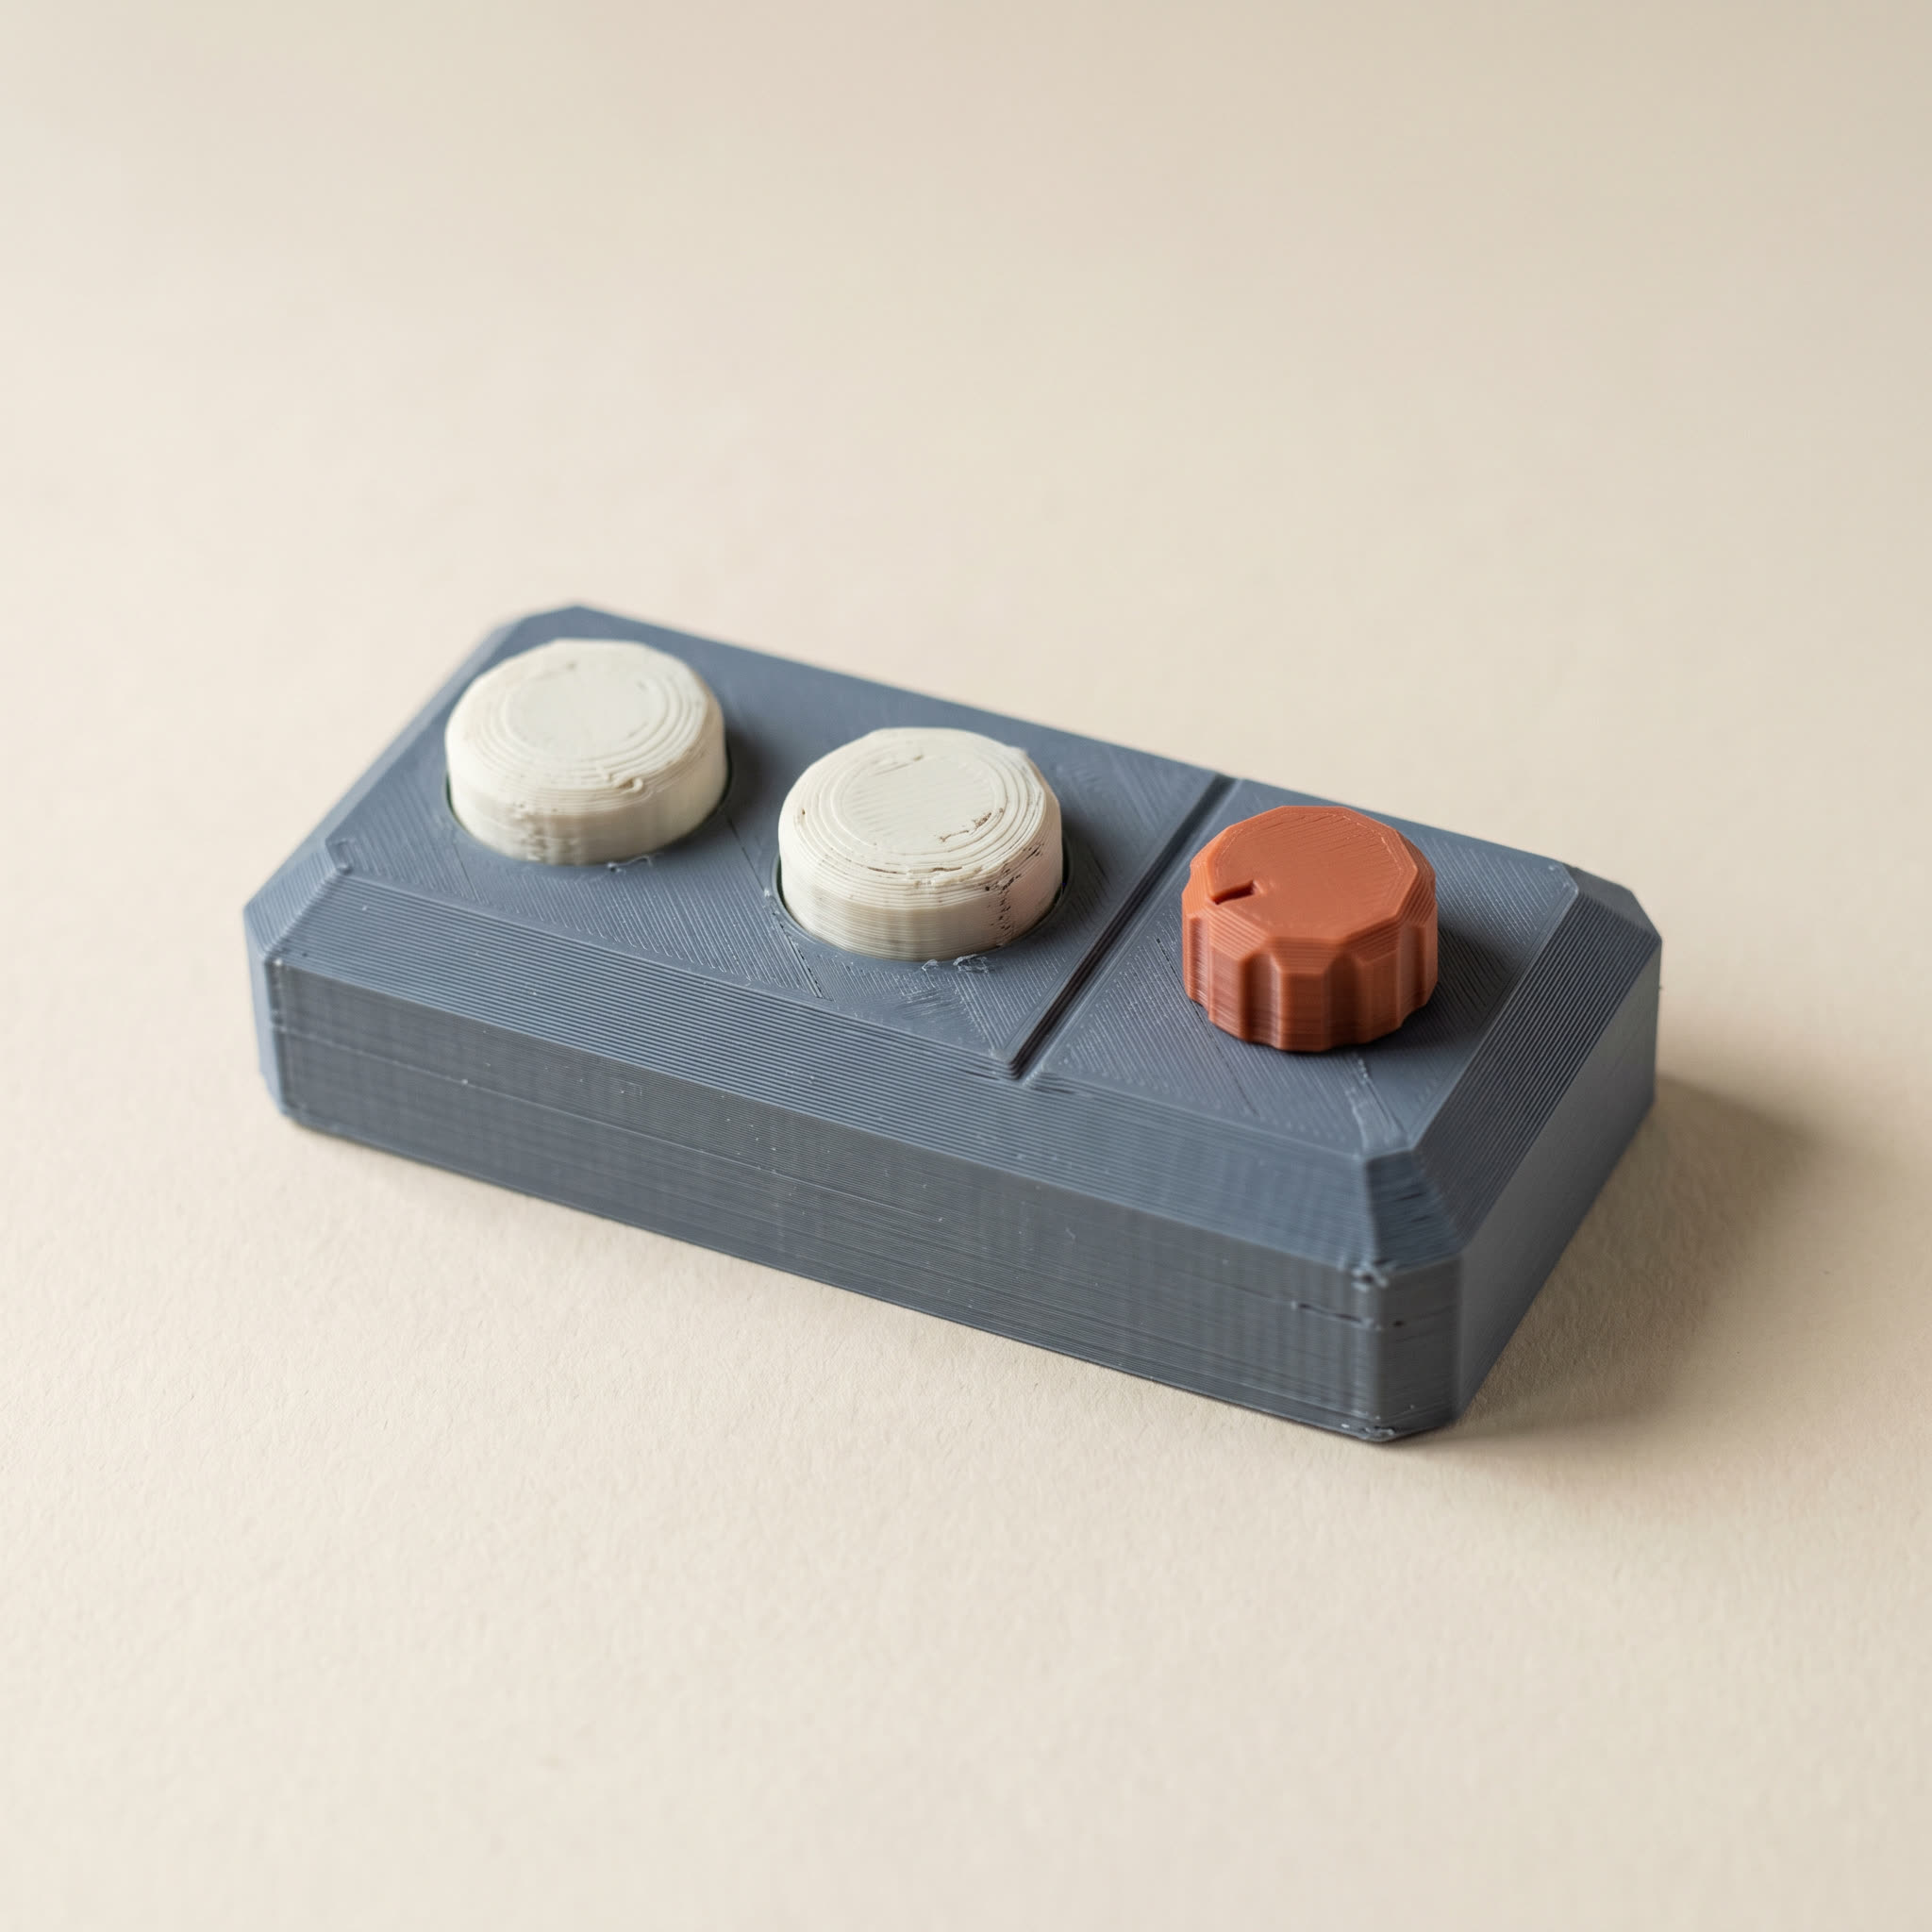
A low-poly sci-fi control panel block, like the one in the hero image above, has a slate-gray body, two raised cream button caps, and a terracotta dial. Painted in roughly a minute with three tools:
- Region tool, click the body. The whole slate plate fills in one click. The buttons and dial sit in their own auto-partitioned regions and stay unpainted.
- Detail tool with the cream chip, tolerance 25°. Click each button cap. The cap paints. The vertical sides of the button cylinder stay slate-gray. If the Region tool had already coloured those sides, Detail doesn't touch them.
- Detail tool again with the terracotta chip. Click the top face of the dial. Top face flips terracotta, the cylindrical body of the dial stays slate.
Three colors, four clicks. None of the recess walls bled and none of the buttons painted the panel behind them. The same job with the Brush would have needed depth-cap tweaks and a cleanup pass after.
When to switch back to Brush
The Detail tool is a poor match for surfaces that curve continuously. The cheek of a chibi figure. The visor of a helmet. The rounded hood of a low-poly car. Those all change direction across the surface. Detail at 25° will only stretch a few centimeters before the surface curves out of tolerance and the paint stops. Brush with Stop at crease handles those cleanly.
Rule of thumb: if you can picture the surface as a sticker pressed onto a different shape, Detail paints the sticker without touching the shape. If the surface curves away from itself, use Brush.
What Detail still respects
Detail inherits the rest of the Brush's guards:
- Depth cap clips the brush along the view direction so it doesn't reach through thin walls to the far side.
- Stop at colour change locks the paint to one existing color group, so Detail only converts faces that are currently slate-gray (or whichever colour the seed face was).
- Stop at crease shares the same dihedral angle that Region uses for auto-partition. Detail won't cross a crease above that angle.
- Symmetry mirrors the strokes across the X, Y, or Z plane. Paint one side of a mech's chest, the matching panel on the other side fills too.
- Shift+drag erases. Useful for unpainting a single cap that you decided should match the body after all.
The brush ring is colour-coded by tool. Detail is blue, Select is green, Crease is yellow, Brush is white. If you can't remember which tool is active without looking at the rail, the ring colour will tell you.
Common questions
How is Detail different from the Wand?
The Wand flood-fills across connected triangles up to a crease edge. It's bounded by the mesh's topology and dihedral angles. Detail is bounded by a circular ring around the cursor plus the normal filter. Use Wand when you want a whole panel filled by a single click. Use Detail when the panel needs to be painted in patches, or when the crease boundary around the patch is too soft for Wand to stop cleanly.
What about the Region tool's crease angle?
Tightening the crease angle splits regions more aggressively, which usually fixes the case where a button and its recess wall ended up in one region. The cost is that it also splits surfaces you wanted left whole, like a curved cheek or a long armor plate. Detail lets you keep the global crease angle relaxed and handle the holdouts case by case.
Does Detail work on the back of the model?
Only on the side facing the camera. The back-face cull is on by default. Orbit to the side you want to paint, then click. The cull is what stops Detail from punching paint through thin walls to the back.
Try it now
Open layerpaint.app/app, drop in an STL with greebles or panel cutouts, and press P twice to land on Detail. The cap-versus-wall problem usually clears up in a few clicks. When you're ready to export the 3MF for Bambu Studio, OrcaSlicer, or PrusaSlicer, your first export is free, then $2.97 for 3 models or $39.97 unlimited. No subscription, no upload, no account.