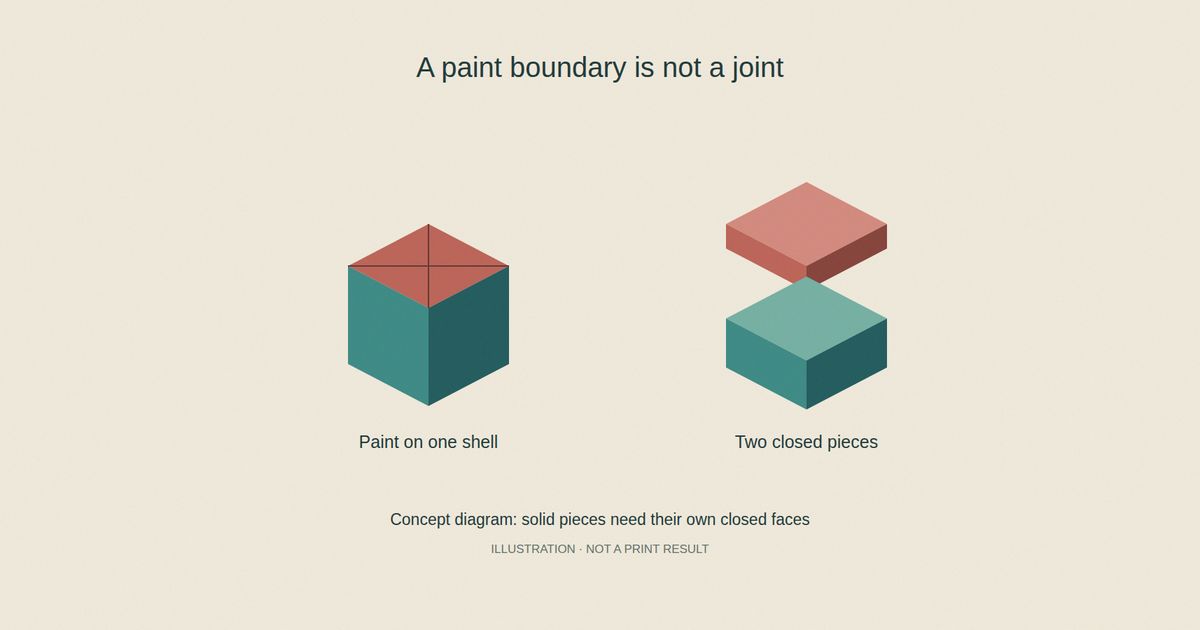
To split a 3MF by color, first check what the colors belong to. Separate mesh shells can become parts. Paint on one shell needs a new cut or a tool that builds solid pieces from the paint. Each piece needs a closed mesh that encloses space, with no open faces.
Start with a copy of your file. In PrusaSlicer, select the model and try Split to parts in the top toolbar. Inspect the new entries in the object list. Do they match the pieces you want? If the command is disabled, or the hat and body remain one part, it has not found the shells you need. Changing a color is not enough to separate them.
Does the file contain parts or paint?
A mesh is a set of triangles that describes a surface. A shell is a connected group of those triangles. One file can hold several shells. A color patch is an area assigned a color; its outline need not be a break in the mesh.
Prusa's split guide explains that Split to parts separates shells while keeping their positions. Split to objects makes each shell an object and places it on the bed. Use parts to keep an assembly aligned; use objects when you want to arrange the pieces for separate prints.
For painted models, Prusa's painting guide states that painting changes the sliced result, not the model itself. Its painted regions cannot be exported as separate parts through that painting tool.
Check the shape, not just the name. A part called “red” may still contain several painted colors. Select each part and check what lights up in the view.
Why copying the red faces leaves a hole
Take a cube with a red top and teal sides and bottom. In the simple mesh made for this example, the whole cube has 12 triangles. The red top has two; the teal remainder has ten.
Put each color's triangles in its own file. The red file is a flat square with no thickness. The teal file has no top. Count the edges in each file and you find four open edges, where only one triangle touches the edge. The whole cube has none.
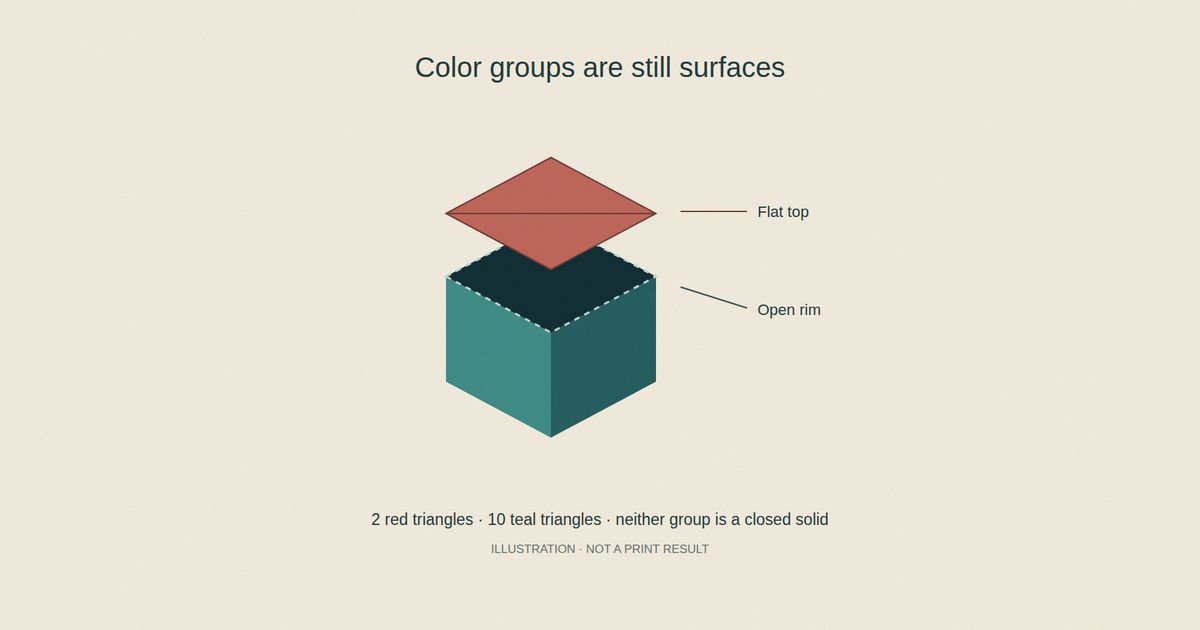
A separate lid needs thickness and its own underside. The body needs a closed top if it should be a solid piece. Paint alone does not say how deep the lid should be or how it should fit.
How to make pieces you can print apart
If the shapes are already separate shells, use Split to parts or Split to objects as described above. Check that every desired piece is a separate entry before saving your working copy.
For one solid model with a straight join, use a cut. In PrusaSlicer, select the model and press C. Choose Planar, then place the cut plane at the intended join. Choose two objects if you want to arrange the pieces apart. Check the preview before applying the cut.
Prusa's Cut tool guide also covers connectors and dowel pins for assembly. Plan that join before you print. A straight cut suits a flat lid or base; it cannot follow a curved painted outline in one cut.
For a curved patch, ask the model’s author for separate solid parts, or design the pieces in CAD. If you try a color splitter, check what it makes. Don't stop at an export labeled “one STL per color.” Open each result alone and inspect the cut faces. Then slice each piece and review the layers. Keep the original painted file until you have checked the output and the fit.
When you only need to change the colors
If you want the same model in different colors, keep it whole. Recoloring a painted 3MF is a different job from making loose pieces.
Layerpaint lets you paint model faces and export a colored 3MF. Its Isolate / Cut tool hides one side of the model so you can reach inside, and Show all brings the hidden side back. That control does not make separate solid parts. See the guide to STL editing tasks for the distinction.
To change which areas get each color, open the Layerpaint painter. For pieces you can print apart and join later, design the separate pieces first.
Prusa sources checked November 10, 2026. The cube example was checked as mesh data. We did not run a physical print or a desktop slicer test for it.