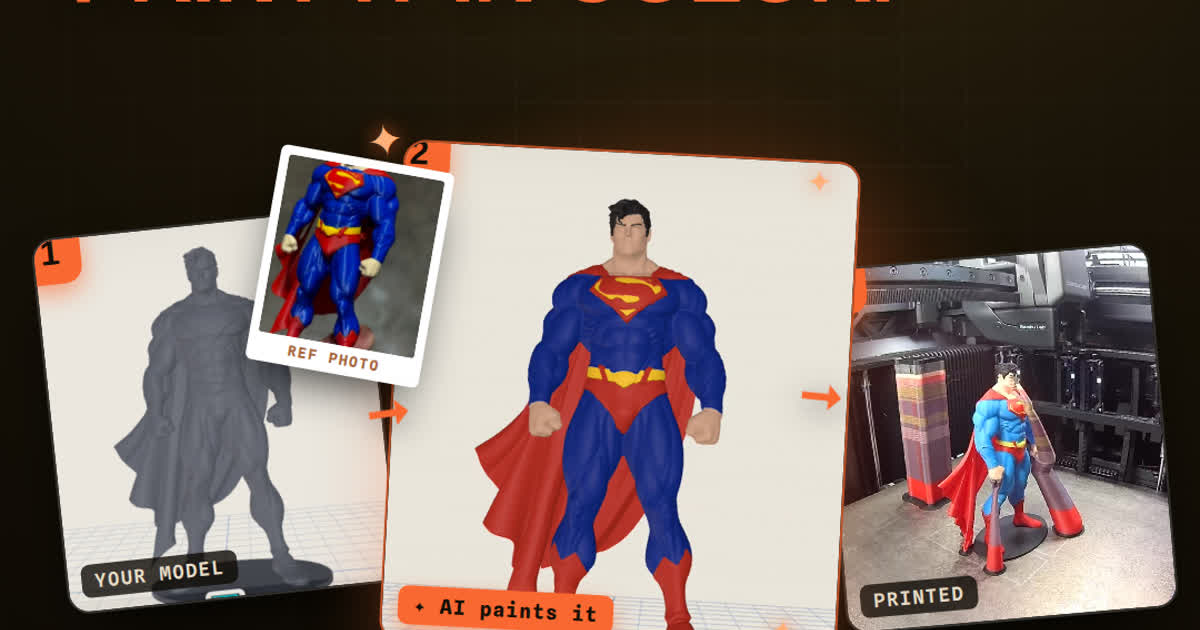
TL;DR: There is no single image to STL conversion. A heightmap relief turns pixel brightness into surface height, which suits lithophanes and wall art. Trace-and-extrude turns a logo or silhouette into a flat printed badge. And when you want the object in the picture as a real model, AI Create in the Layerpaint painter generates the geometry from your photo, you paint it in the browser, and you export a Standard 3MF for multicolor printing. First generation is free.
What "image to STL" actually means
A picture is a flat grid of pixels. An STL is a 3D surface. Nothing in a PNG or JPG stores depth, so any converter has to invent the third dimension from what is actually in the file: brightness, edges, or a learned guess about what the photographed object looks like from the sides you can't see.
Those three sources of depth give you three routes, and they produce very different prints. The choice depends on what you're making, not on the file format. Whether you convert a PNG, a JPG, or a screenshot, image to STL is a family of techniques rather than one button.
Route 1: relief conversion, the classic image to STL
When people search for a way to convert an image to STL, this is usually the tool they find. The converter reads the picture in grayscale, maps each pixel's brightness to a height, and builds a mesh over that grid. Bright areas rise, dark areas stay low. For a lithophane it inverts: dark areas stay thick, bright areas go thin, and a backlight shines through the thin spots. The idea predates 3D printing by a long way; lithophanes were carved into porcelain in the 1820s, and a backlit relief print is the same trick in white PLA.
This route fits lithophanes, embossed panels, coin and medallion blanks, stamped textures, and topographic wall art. A heightmap of real elevation data is the one case where the conversion is exact, because the brightness in the source genuinely is height. Plenty of free relief converters exist online, and most slicers can slice their output directly. If your job is flat and decorative, this is the right tool and you don't need anything fancier.
PNG beats JPG as a source. A PNG to STL conversion comes out cleaner than JPG to STL because JPEG compression leaves block artifacts around edges, and in a relief those artifacts turn into physical bumps. If a JPG is all you have, a light blur before converting knocks the noise down.
Know what you're getting, though. A relief is not a sculpture. Brightness stands in for depth and is often wrong about it — a shadow across a face becomes a trench, and a white shirt becomes a plateau. Portraits work as lithophanes precisely because you view them backlit, where brightness is the whole point. Viewed from the side in daylight, the same conversion looks like a lumpy plate.
Route 2: AI generation, a real model from the picture
A photo to STL conversion in the relief sense gives you a flat-backed plaque. If you want the object in the photo as an actual model you can rotate and print in the round, that isn't a conversion at all. It's generation. AI Create inside the Layerpaint painter does this: give it a photo or a text prompt and it generates printable 3D geometry. Your first AI generation is free (Paint or Create, whichever you use it on), so you can judge the result on your own picture before paying anything.
Exporting the print file for an AI-built model is a paid step, though: it needs an export pack or the unlimited export licence, even if you paint the model by hand. The free first export only covers a model you bring and color yourself. See the current pricing.
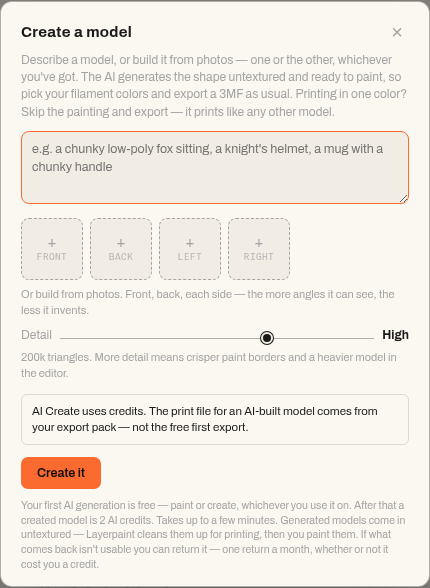
Be clear about what comes out. The generated model is untextured, meaning plain geometry with no color on it. That's deliberate, because the paint step is where you decide which filament goes where. You paint the model in the browser with the region and brush tools, then export a Standard 3MF that Bambu Studio, OrcaSlicer, and PrusaSlicer read with the colors already assigned. If you already have a model and want a photo's colors applied onto it, that's a different feature; we covered it in color a 3D model from a photo.
If the thing you specifically need at the end is an STL file — a customer asked for one, or a tool downstream only reads STL — export the 3MF (the paid step above) and run it through our free model converter. It swaps between 3MF, STL, and OBJ in the browser. STL strips the color, because the format can't hold any, but the geometry carries over exactly.
The limits are baked into the physics. A single photo shows one side of an object, so the AI approximates the back and the hidden parts from what similar objects tend to look like. Sometimes the guess is convincing and sometimes it isn't, which is another reason the first generation is free. Generated meshes also occasionally arrive with holes or non-manifold edges; our browser STL repair tool diagnoses and fixes those without an upload.
Route 3: trace and extrude, for logos and silhouettes
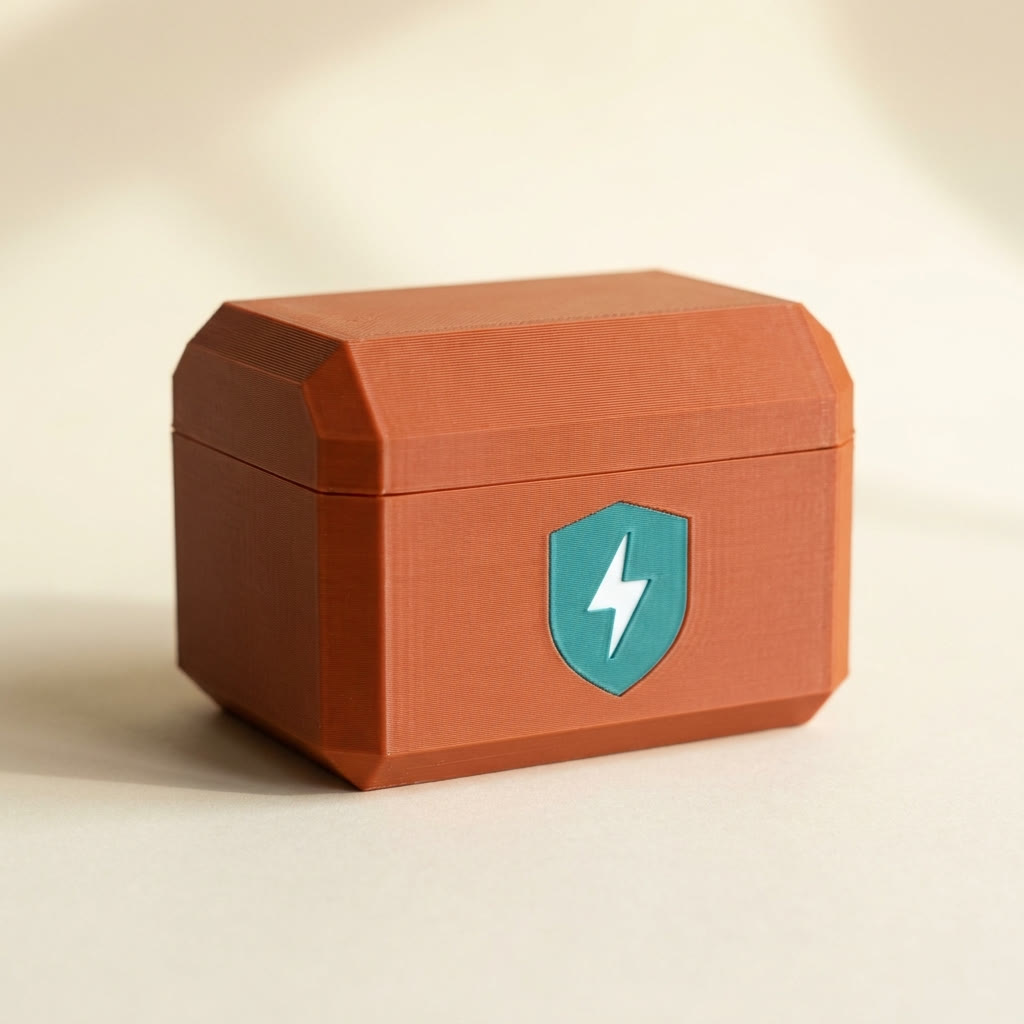
A logo to STL job shouldn't go through a heightmap at all. Logos are flat shapes with hard edges, and running one through a brightness-to-height pass gives you lumpy anti-aliased slopes where you wanted a crisp step. The right treatment is to threshold the image into dark and light, trace the outlines into a vector, and extrude the shape a few millimeters. Any CAD tool that imports SVG can do the extrude, and the result is a clean badge.
If the badge isn't the end goal and you actually want the logo sitting on a model — the side of a case, a curved fender, a stand you generated in route 2 — the decal workflow in the painter handles that directly, including the color assignment for multi-filament printing. Put a 3D printed logo on any model walks through it start to finish.
Which route fits your picture?
Match the image to STL route to the source material:
- A portrait or photo to display flat — relief. Backlit as a lithophane if it's a photo of people.
- A company, team, or channel logo — trace and extrude, or the painter's decal workflow if it's going onto a model.
- A texture or pattern for a panel — relief, shallow depth.
- Elevation data or a terrain map — relief. This is the exact case.
- The object in the photo, as an object — AI generation, then paint it in the editor and export the 3MF.
What no converter can recover
Every 2D image to 3D model conversion invents information, because the image has no depth channel to read. The relief route invents depth from brightness, the trace route invents it from a fixed extrude height, and the AI route invents it from training data. All three can produce a print you're happy with. None of them recovers the true geometry of the thing that was photographed, so if a part has to fit against something, model it in CAD from measurements instead of converting a picture of it.
The formats matter less than people expect. STL, OBJ, and 3MF all describe the same triangles; only 3MF carries color that slicers honor, which is defined in the 3MF Materials Extension. That's why a multicolor result from any of these routes ends in a 3MF, with STL as the fallback when a downstream tool demands it.
Common questions
Can I convert an image to STL for free?
The relief and trace routes can be, since free relief converters and free vector and CAD tools are easy to find. The AI route has one paid step. In Layerpaint, your first AI generation from an image is free and the model converter that turns a 3MF into STL is free, but exporting the print file for an AI-built model needs an export pack (10 exports for $6.97) or the $39.97 unlimited licence.
PNG to STL or JPG to STL — does the source format matter?
Both work, but PNG comes out cleaner. JPEG compression adds edge noise that becomes real surface texture in a relief. For logos, a PNG with a transparent or solid background thresholds far more cleanly than a compressed JPG. AI generation is the most forgiving of source quality, since it isn't reading pixels as geometry.
Does the exported STL keep the image's colors?
An STL can't. The format stores bare triangles and has no color data that slicers honor, which is why every converter that only outputs STL gives you a monochrome model. To keep the colors, paint the model and export a 3MF instead; multi-filament slicers read the per-triangle paint directly and map it to your AMS slots.
Can the AI recover the back of the object from one photo?
Not exactly. It fills in the unseen side with a plausible guess based on similar shapes. For symmetric objects the guess is usually fine; for anything with distinct front and back detail, expect to inspect the mesh and possibly regenerate. Check it in the painter before you print.
Try it now
If your picture is a flat decorative job, grab any relief converter and print it. If you want the thing in the picture as a real model, open the painter and run AI Create. The first generation costs nothing, so you can check the shape before you pay for an export. Paint the result in the browser, and the export is a multicolor 3MF your slicer reads directly.
Happy printing. 🎨