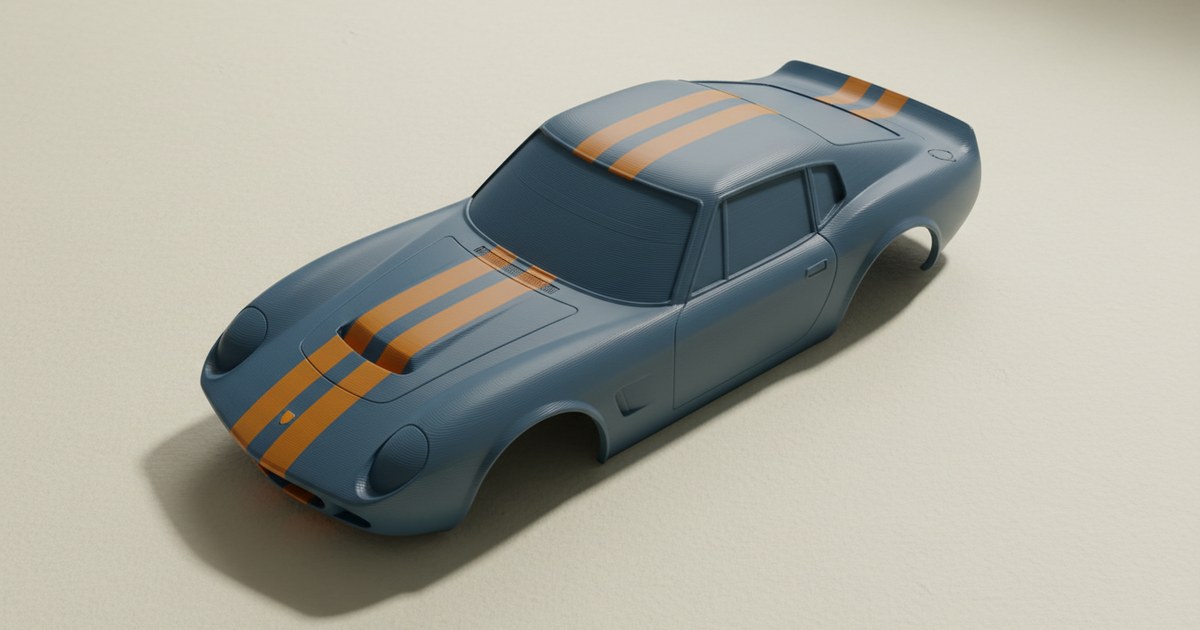
TL;DR: To get clean stripes on a 3D print, don't freehand them. In Layerpaint, pick the Shape tool, drag a line down the model (hold
Shiftso it snaps straight), move and resize the preview until it sits right, and hit Apply. The mesh subdivides along the stripe's edge, so the boundary is crisp even on a coarse mesh. Export a Standard 3MF and Bambu Studio, OrcaSlicer, and PrusaSlicer print it as a solid filament region.
Why are stripes on a 3D print so hard to get straight?
Because every usual route fights you. Painting stripes on a 3D print with a slicer brush means dragging a round cursor along a curved surface and hoping your hand doesn't drift — it drifts. Splitting the model in CAD gets a perfect edge but costs an evening and a rebuilt STL every time you change your mind. And masking tape on the finished print is a painting job, not a printing job.
The edge is the whole game. A stripe reads as intentional when its boundary is dead straight, and a mesh only lets color change along triangle edges. On a coarse model the triangles are big, so a hand-painted boundary staircases. That's the part the Shape tool fixes: it subdivides the surface along the shape's edge before it paints, so the color boundary follows your line, not the mesh you happened to load.
Step 1 — Load the model and pick your colors
Open the painter and drop in your STL, OBJ, or 3MF. Pick the filaments you actually have loaded — one chip for the body color, one for the stripe. The library covers Bambu, Polymaker, Prusament, Overture, Sunlu, eSUN, Elegoo, Creality, and Hatchbox, so the preview matches the spool.
Paint the body color first so the stripe only has to win the faces it covers. The Region tool floods the whole shell in a click or two.
Step 2 — Drag the stripe on with the Shape tool
Select Shape in the toolbar. A small dock appears next to the palette with the three shapes — Line, Rect, Circle — plus Fill or Outline and a width slider, so the shape and the color sit in one reach.
For stripes on a 3D print, take the Line, set the width, and square the camera up to the surface first — the shape projects from your current view, so a straight-on camera puts the stripe where your eye expects. Then drag from nose to tail. Hold Shift and the line snaps to 45° increments, which is what makes it dead straight instead of nearly straight.
A classic double racing stripe is just two applies. Lay the first line, Apply, then drag a second one beside it — the preview handles make matching the gap easy. The Shape tutorial walks the whole flow with a helmet.
Step 3 — Adjust the preview, then Apply
Nothing bakes in when you release. The stripe settles as a preview sitting on the model: drag it to move it, grab a handle to resize it, orbit the model by dragging outside it. When it sits right, hit Apply — the mesh subdivides along the edge and the faces take the color. Wrong call? One Ctrl+Z removes the whole stripe, added triangles included.
The preview stage is worth trusting. It's the difference between committing to a stripe and auditioning one, and it's why a wobbling first drag doesn't matter — you fix it before anything is painted.
Beyond stripes: rectangles, circles, and rings
The same drag works for the other two shapes. A filled rectangle makes a painted panel, a screen, a badge field. A filled circle makes an eye, a port, a dot; switch it to Outline and set the stroke width for a ring. Stack a filled circle in one color with an outline ring in another and you have a roundel — three drags, no artwork required.
If what you want on the model is artwork rather than geometry — a logo, typed words — that's the Decals tool, which stamps an image into the mesh the same crisp way.
Step 4 — Export and print
Hit Export 3MF. Layerpaint writes a Standard 3MF with per-triangle color via the Materials Extension, which Bambu Studio reads through its Standard 3MF Color Parsing dialog and OrcaSlicer and PrusaSlicer open directly. The stripe slices as a solid filament region — the same mechanism as slicer-embedded text, so the printed edge is as sharp as the painted one.
Stripes are cheap to print, with one caveat: a stripe that runs up the Z axis means a filament swap on every layer it spans. Turn on the swap bar before you commit, and if the purge cost stings, the purge-waste guide shows where the waste actually goes.
Common questions
Do stripes work on a curved surface?
Yes. The shape projects from your camera view onto whatever sits under it, curved or flat. Line the camera up square to the surface first so the stripe lands where your eye expects it.
My stripe wrapped onto the far side of the model. Why?
The shape paints the front faces it covers. If a hidden part of the model pokes into the shape's footprint, isolate the far side away first with the Isolate tool, or apply the stripe from two views.
Can I do circles and rings, not just stripes?
Yes — lines, rectangles, and circles, each filled or as an outline with an adjustable stroke width. A filled circle plus an outline ring in a second color makes a roundel.
Does my mesh need to be high-resolution for a clean edge?
No, and this is the point: the surface under the shape's edge is subdivided before the paint lands, so stripes on a 3D print come out crisp whether the mesh is 5,000 triangles or 500,000.
Try it now
Open the painter at layerpaint.app/app, load a shell or a helmet, and drag your first stripe in under a minute. Your first 3MF export is free; after that, $6.97 for 10 exports or $39.97 unlimited, no subscription, and your model never leaves your device.